

Many are not familiar with the FamilySearch catalog, just the general record search and trees. The majority of global FamilySearch digital records are NOT indexed! This tutorial will focus on using place searches within the United States, but records are available globally.
Accessing the Catalog
If you have never used FamilySearch, you will need a username and password. Signing up is free! After you’ve signed up, there are several different search options available. This blog post focuses on the catalog and searching by place.
Clicking on Search and then Catalog or going directly to https://www.familysearch.org/search/catalog will bring you to the general catalog search page.
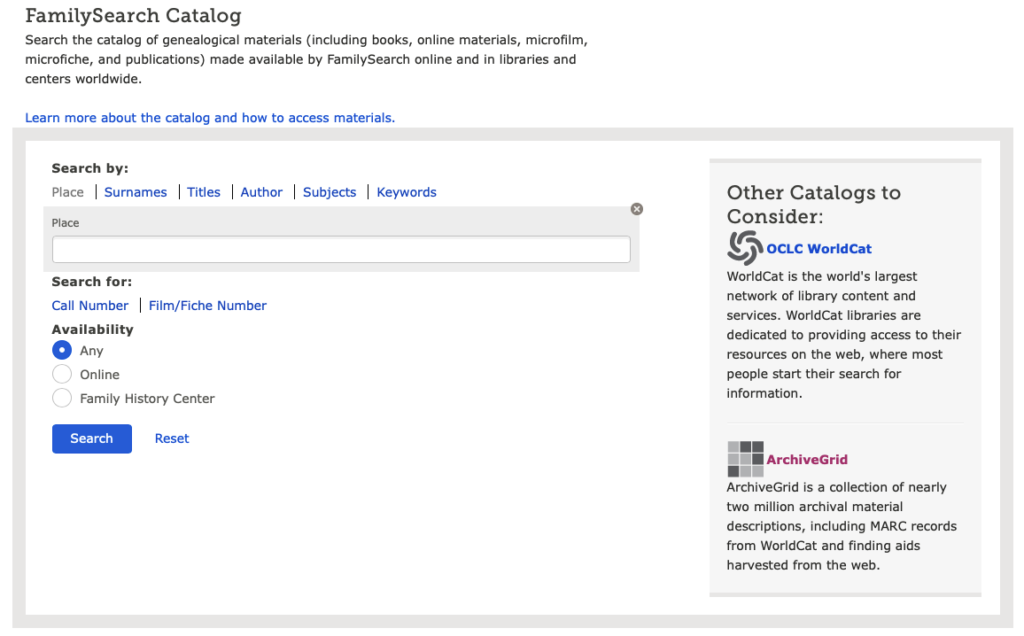
Place Searches
Searching by place allows you to isolate records from a single area. You can view records by country, state, county and even some specific cities or towns. In the search bar, start with the country you would like to research and follow that by a comma, then the state, then the county. You can also simply type in the state and see what is available from the dropdown.
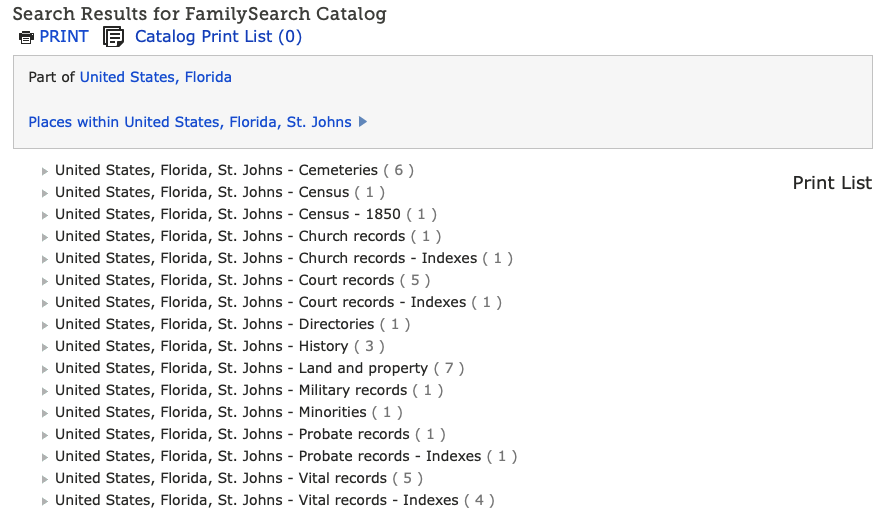
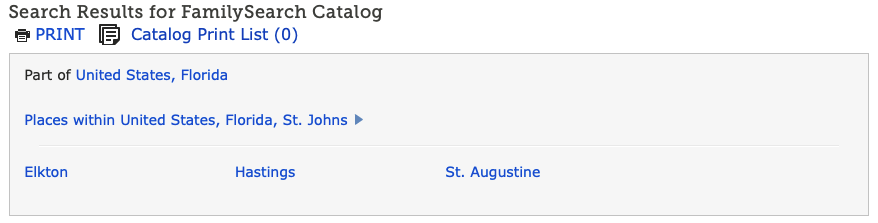
If you want to see what cities or towns are available in this county, clicking on “Places within…” will reveal the cities available. Clicking on the city or town will give you the records available.
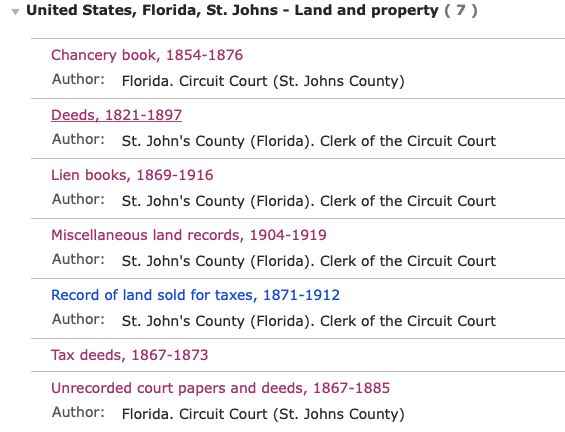
With the St. Johns County, Florida example, you can see all of the available record sets for St. Johns County. A closer look at Land and Property reveals the various land records available in that county:
Understanding the Formats Available
Not every record set that comes up in a place search is available in digital format.

This icon indicates the record is only available in microfilm. At this time, the Family History Library is no longer lending microfilm. To access these you will have to go to the Family History Library in Utah to see them.

Any camera icon with a search icon means there is an indexed database attached to the record group. As a note, it is always a good practice to view the image, when one is available. Transcription errors exist!

Any camera icon with a key above indicates these records are locked. You cannot view them from your home, you must be at a designated Family History Library or a FamilySearch Affiliate Library. Click to find your closest library.

A single camera icon indicates these records are viewable and unindexed. These records are digitized books and you will have to flip through the books as if you are viewing them in person. Each record set is unique.
Now that you are familiar with the different viewing icons, let’s work with unindexed records.
Working with Unindexed Records
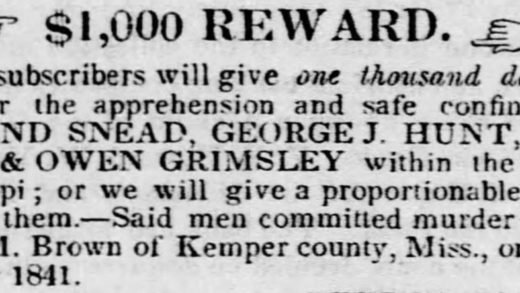
Following our example images above, you will be working with Land and Property records from St Johns County, Florida, searching for deeds with Owen Grimsley.
Clicking on Deeds, 1821-1897, there are many record sets available. Clicking on the camera icon for Grantor Index A-G, I find 674 images available of the grantors with last names starting with A through G.
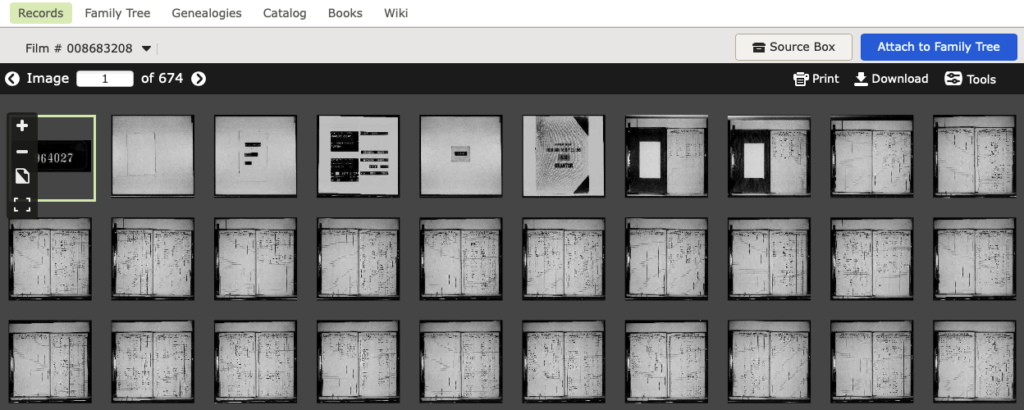
Working with the View Screen
It’s important to know the different parts of the viewing screen. Here is a brief overview:

This tool set allows you to move through the images, image by image, or by typing in an image number. The left arrow moves you back one image and the right arrow moves you forward one image. Typing in a number and hitting enter/return takes you to that specific image.

The tool set on the left side of the viewing screen changes depending on how you are looking at the records. The left image is viewing all records and the right image is viewing a single image. The + icon zooms in on the record and the – icon zooms out. The third icons that look like a page or squares toggles between viewing the image and viewing multiple images. The brackets toggle to a full screen or out of a full screen.

These icons on the upper right of the viewing screen allow you to print and download the image. Clicking on Print will allow you to print the image that is viewable. Clicking on Download will allow you to download the entire image.
Clicking on Tools brings up three new icons. These icons allow you to adjust the image.
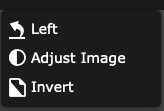
- Left rotates the entire image one turn counter clockwise. This is helpful when an image is filmed horizontal but the text is not.
- Adjust Image allows you to adjust the brightness and contrast of the image. This is helpful if the image was scanned too dark or too light. To adjust the brightness and contract, move the bars to the right to make it brighter or to the left to make it darker. To return to the original adjustment, simple move the bars back to the center.
- Invert will invert the black and white of the image. This is helpful when an image has been scanned too dark and the white text will stand out better than the black text.
Now that you know the tools you are working with, let’s continue with the example.
The Grantor index A-G record set is created by several books. The first image of the record set is image 6. This is the book General Index from 1820 to July 15, 1925 A-B Grantor. This indicates there are multiple books in this record set. Viewing multiple images zoomed out, I can scroll down, looking for the next book cover. The General Index from 1820 to July 15, 1925 C Grantor appears on image 221. Scrolling further, General Index from 1820 to July 15, 1925 D-E-F-G Grantor appears on image 383. You’re looking for “GR” which should appear toward the end of the records images. The surname Grimsley appears on image 669.
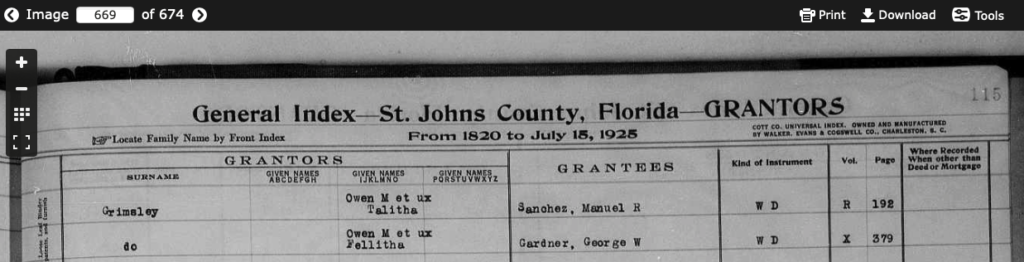
Viewing the index, our next step is to take note of the volume and page number you need to view. In this case, Volume R – Page 192.
Clicking on your browser back button will take you back to Deeds, 1821-1897. Scroll down until you find Deeds R-S 1863-1869.
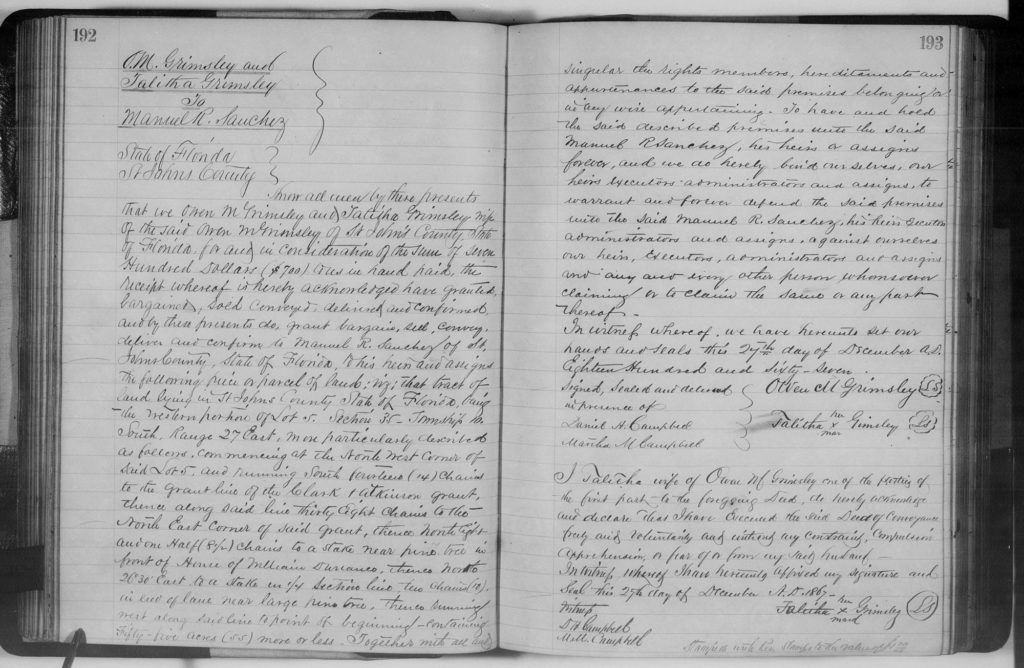
Deeds R-S 1863-1869 does have a small index after the book cover. Image 14 confirms the deed appears on pages 192-194 in the book.
Tip: Page numbers are not image numbers. Page numbers appear on the image in the upper left or right hand corner.
Deed Book Volume R is the first book in this record set. If you needed Deed Book Volume S, using the same method as above, you would view the multiple images and scroll, looking for the book cover.
This book has two pages per image. Using the image tool bar, you can guesstimate the image those pages should appear on.
Page 192 appears on image 139.
General Tips
Many books will be indexed. Before you start reading page by page, check for an index first! Sometimes this index will be a separate book. The index can appear just after the book cover or even at the end of the book.
Read the notes on the page before clicking to view the record set. These notes are helpful to understand what the record set may contain.
Occasionally under notes, there will be a link to view the record sets. For example “Florida, Probate Records are available online, click here.” Clicking on “click here” takes you to all of the Florida Probate Records, 1784-1990. Clicking on a county will take you to all of the different probate records that exist for that county. Some records are county based and others are state based. This brings those records together.
Get to know the record set you’re looking at. Find commonalties and how the set is organized. Understanding the record set will help you streamline the time you spend analyzing the records it contains.


1 Response
[…] Eventually, the newly imaged records will end up in the FamilySearch Catalog. This is a good starting point to see what records are available, by category. The default search parameter is “Place” and searching by “Cuba” as a country, brings up a long list of records, sorted by category. If you’re not familiar with searching the catalog, view my past post on Using the FamilySearch Catalog. […]